|
|
|
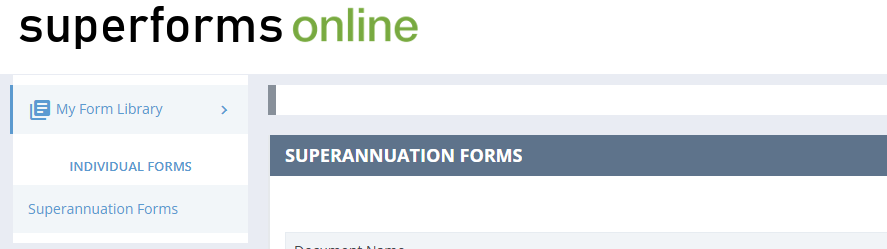
SUPERANNUATION FORMS
|
|
|
|

|
|
|
|
USER
GUIDE
|
|
|
|
www.superforms.com.au
|
|
|
|
|
|
|
|
|
|
|
|
|
|
|
|
|
|
|
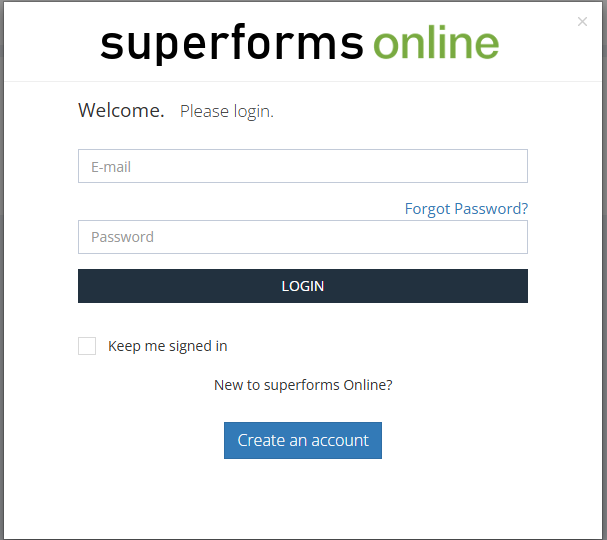
Member
Login
|
|
First
time in for the Company should be done by your Management
person or Principal as this will be the person who manages the access for
your staff.
|
|
|
|
To
Login to your account type in your unique email address plus your password.
|
|
|
|
|
|
|
|
|
|
|
1
|
Settings
|
|
Once
you’ve logged in go to the Settings tab (top right hand
corner)
|
|

|
|
The
Settings dropdown menu has:
- 1.1 My Account
- 1.2 My Invoices
- 1.3 My Password
- 1.4 My Users
- 1.5 My Clauses
- 1.6 My Templates
- Sign Out
|
|
1.1
|
My Account
|
|
Fill
in all your details as these details are what will show on your forms.
- Company Name
- Trading Name
- ABN / ACN
- Address Line 1
- Address Line 2
- Suburb
- State
- Post Code
- Phone
- Email
|
|
Once done click 💾 Save Account Details at the bottom
|
|
|
1.2
|
My Invoices
|
|
Gives
a purchase history of the forms you have purchased.
|
|
Clicking
on the 📎 Download button downloads a pdf of
that invoice.
|
|
|
|
1.3
|
My Password
|
|
To
change your Password
|
- Type in your Current
Password,
- then New
Password
- and Re-type
New Password then click 💾 Save Password
|
|
1.4
|
My Users
|
|
IMPORTANT
– This is only to be done by the Administrator / Principal person who
manages access for all of your Salespeople and
Staff as Users (the Main Account).
|
|
Each
User is to be enabled and will need to have their own email address.
|
|
Go
to My Users and click + Add User
|
|
|
Another
window opens to Add a new user
|
|
Type
in their Name, E-mail and Mobile phone and choose to enable what they can
do ie be a Template editor such as your support
personnel) then click 💾 Save User Details
|
|
|
The
options are:
|
|
Management
Access - promotes the user's admin privileges such that they are a main
user
|
|
Own
Forms Only - when checked "Yes" the User will not be able to
edit any forms that are not theirs, when checked "No" the
user will be able to edit forms across the agency.
|
|
Template
Editor = Yes – allows the User to be able to create/edit/delete
Templates across the agency (ie support
personnel who create docs for agents).
|
|
Enabled
(Main Account only) – This is to switch a User’s
access on or off.
Yes = access allowed
No = no access allowed (ie has left agency)
|
|
|
|
Once
a User is added, superforms
will automatically send an email to that User with the subject “Your
new superforms Password”.
|
|
The
email contains a temporary Password. The User will then need to Login using
their email address and the temporary Password.
|
|
Once
the User has logged in, they can change the Password to suit themselves
(see My Password previous section). They will then have access to create
forms.
|
|
Editing
or Removing Users
If your need to amend (Edit) or change Enabled to No (disable) a User’s access then go back to Manage Users
and select the required Action. Either change “Enabled” to No or Delete the
User.
|
|
Note: When Main Account
“Deletes” a User – any forms that were created by the deleted User will
then transfer to the Main Account’s forms list.
|
|
1.5
|
My Clauses
|
|
Is
designed as a library of clauses for you to create and manage your firm’s
specific special clauses that can be inserted into Contracts or other
forms. To create a specific clause click on +
Create Clause to open a new window to create and save a new
clause.
|
|
|
|
See
also Special Clauses for Additional Terms
|
|
1.6
|
My
Templates
|
|
To
access the Templates – go to Settings - My Templates
|
|
This
provides a list of all of the forms within your
library that you can create a template for.
|
|
|
Actions
available here are Create template / Open Saved
|
|
Create
template opens the form where you can edit and save for further use
|
|
Open
Saved brings up a list of all the saved templates for this form
|
|
|
Actions
available here are Edit, Preview, Rename, and Delete
|
|
See
also Using Templates
|
|
|
|
|
|
|
|
|
2
|
Purchasing
Forms
|
|
Either
use the right hand navigation tool, or the search
bar at the top of the form to find the forms you require
|
|
To
add a form to your cart, push the cart button that indicates the price (if
the form is not in your library already, it is in the Expiry Column), then
confirm what you want to add to your cart by pushing the Add to
Cart button
|
|
|
Follow
the CART button at the top of the page, your Checkout will
begin with a list of the items in your cart. Select the Checkout
button to pay for your items. They will then appear in the Library
|
|
|
If
a form is free it will be added to your library
directly instead of your cart.
|
|
2.1
|
Renewing
Forms
|
|
When
a form expires, it will still appear in your Library, but you will not have
the ability to create new forms or templates. To renew the form, press the
button with the trolley cart and the price on it to add it to the cart.
|
|
|
|
|
|
|
|
|
|
3
|
Searching
|
|
To
search for a form, find the search bar at the top of the page and type in
part of the Document Name or Code.
|
|

|
|
All
forms that fit the search, purchased or not, will appear in the search
|
|
|
|
|
|
|
|
|
|
4
|
How to
Create Forms
|
|
From
your Home screen on the left hand side is 📄 My Library, which contains all of the forms you have purchased / have access to.
|
|
|
|
Scroll
through the forms then click + Create Document
|
|
|
At
the prompt Enter a Reference Name (and a template if you have created one
for this form), then click “Save and create form”
|
|
Note The Reference name will
appear on your document at the bottom of the front page
|
|
You
will see your form on screen. Work through the form to type in your
required information in the spaces provided (fields).
|
|
If
any text exceeds the field space it will turn red and automatically
generate to an Annexure.
|
|
At
the bottom of the screen are the following buttons, from left to right they
are:
- Add/Remove PDF
- Save As... (To
save a duplicate of the form but with a different name)
- Save
- Preview/Print
(creates an on-screen PDF to print or download)
- Close
|
|
|
4.1
|
Attach PDF
|
|
Click
on button to attach a single PDF to your document. A new pop
up window will open with instructions on how to attach your pdf. The
pop up window also had instructions on how to
remove an attached pdf.
|
|
|
|
|
|
|
|
|
|
|
5
|
|
Printing
|
|
|
From
Saved Forms list go to either
- Preview and select either
Download or Print
- From the open
Document on Screen Click on the Preview/Print button
to see your form as it would appear before you print. Go to either
icon on screen to Print 🖶 or Download
⤓
|
|
|
|
|
|
|
|
|
|
|
|
|
6
|
When Forms
are Updated by superforms
|
|
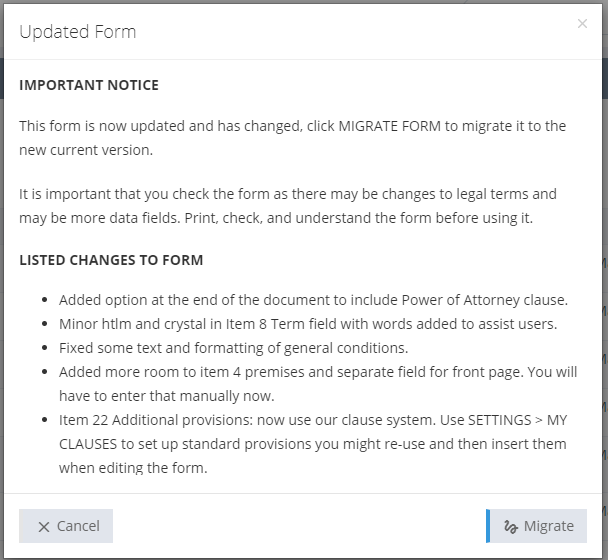
If
a form has been updated by from when you last accessed
it a window will pop up to say that the form needs to be migrated.
The changes are listed out in the message window. Migrating the form will
update the form with the changes. If you select Cancel the form can only be
previewed with no editing available.
|
|
|
|
|
|
|
|
|
|
|
7
|
Saved Forms
(Created Forms List)
|
|
|
|
Clicking
Saved shows all the forms you and the business (all users)
have created for that particular form. This
effectively becomes your Library of forms.
|
|
Once
a form is created you then have options listed under the Action
column:
|
|
Edit
Document / Download PDF / View Document / E-mail PDF / Rename Document /
Delete Document
|
|
|
From
within Saved Forms there is also access
to create a new form + New (form name)
|
|
|
|
|
|
|
|
|
8
|
Special
Clauses for Additional Terms
|
|
In
your Contracts, some functionality has been built in to Select or
Create Clauses (pre-set options will vary depending on the form).
|
|
|
Clicking
on Select or Create Clauses opens
another window to select pre-set clauses or add in My Clauses
or add in Standard Clauses or add in Add Blank
Clause
|
|
|
Clauses
selected or added appear in your document to Edit
/ Delete as necessary
|
|
|
To
Edit – select Edit to open the clause
|
|
Note: The Special Clauses
will appear as an Annexure within the Contract.
|
|
|
|
|
|
|
|
|
|
9
|
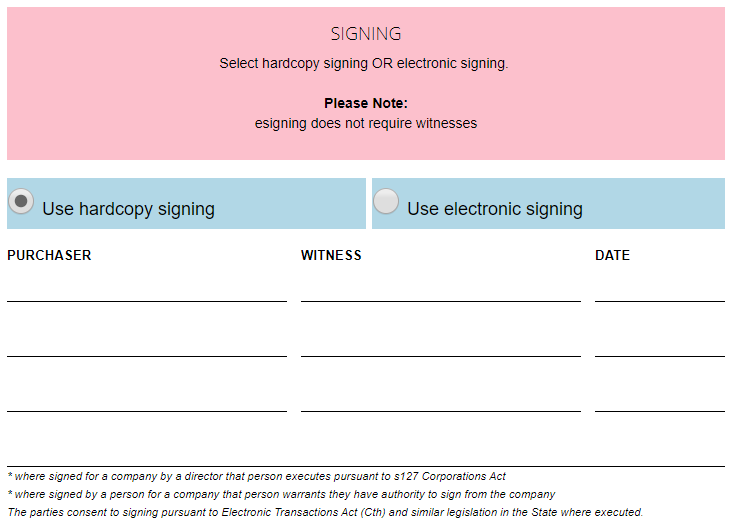
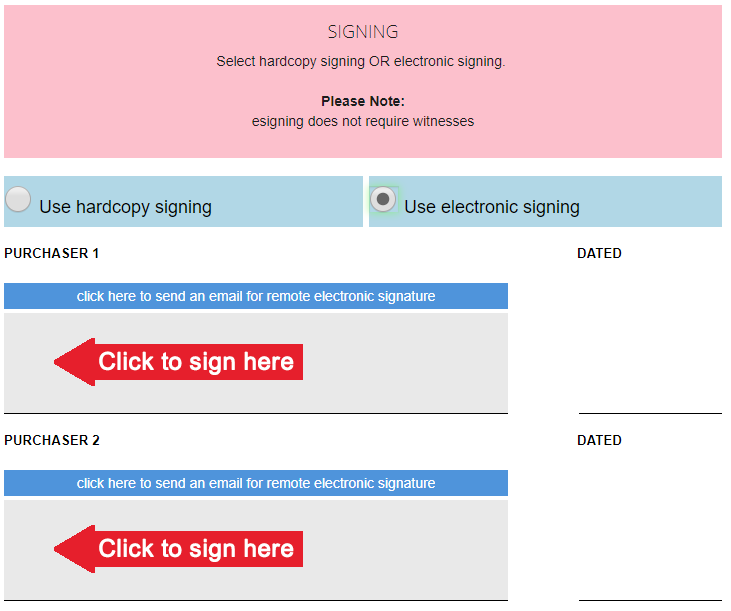
Contracts –
Signing Options – Hardcopy or Electronic
|
|
Contracts
can be enabled by the user to be either Hardcopy so to be normal print only
with a witness OR Electronic (eSigned)
which does not require witnessing.
|
|
To
enable at the signing section select either
|
|
Use hardcopy
signing
|
|
|
or
Use electronic signing
|
|
|
|
Refer
to the following section for operating eSignatures.
|
|
|
|
|
|
|
|
|
10
|
eSignatures
– Electronic Signing
|
|
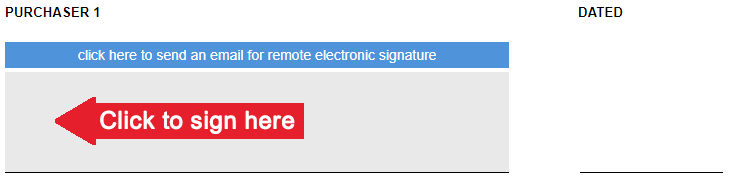
Once
at the eSigning section there are the
options to click to send an email for remote electronic signature
or Sign Here you can send the document immediately to your
client for them to print to sign or eSign
and return to you.
|
|
|
|
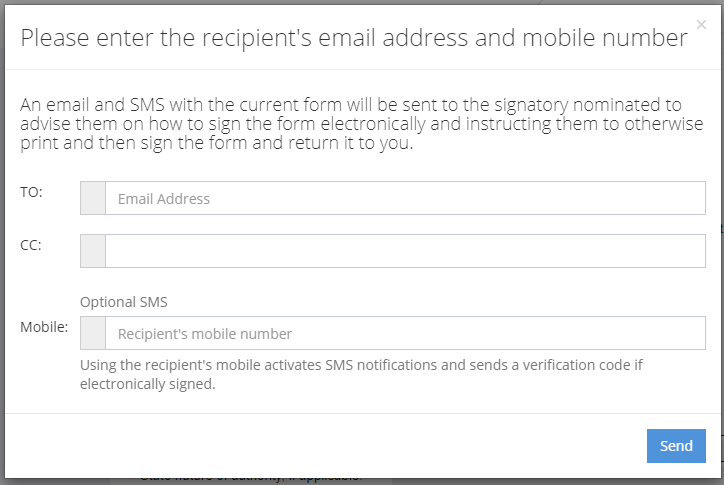
send
an email for remote electronic signature will pop up another
window for you enter an email address which will also automatically CC your
email.
|
|
|
|
Plus there is now an added security option to include your
Recipient’s mobile number. This enables an SMS message to be sent advising
them that a document has been sent by email for them to eSign.
|
|
The
SMS message sent will read as similar:
|
|
“Smith
& Co has emailed
you a document to sign online. Please call them on 0419888482 if you did
not receive it.”
|
|
The
Recipient will receive a noreply email stating
who has sent and what the document is that has been sent to sign. An option
to Electronically Sign The Form is available with
an attached pdf of the form.
|
|
Once
Electronically Sign The Form has been clicked a
window pops up for the recipient’s Signing Consent
|
|
|
After
I Agree another window now pops up for the SMS Verification Code to be
entered (again an SMS message is sent with a generated code)
|
|
|
The
code sent by SMS can now be entered to proceed to Remote Signing
|
|
|
Once
the recipient is at Remote Signing they can opt to
do their own signature / create a text signature or upload a signature.
Once done click Save.
|
|
A
Thank You message then pops up to advise that an email has been sent to the
Agent confirming the eSigning of the
document.
|
|
|
|
Alternatively you can Sign Here to enable an eSignature
to be done.
|
|
Once
an eSignature has been done on the form it will become “locked”
and will show the signature on the screen.
|
|
Other
eSignatures can be added after the form is locked but the contents
of the form cannot be edited.
|
|
To
edit a locked form click the Unlock
button – this will clear all eSignatures and allow editing to be
done. You will first be asked if you wish to save a copy of the signed form
before unlocking and releasing the signatures.
|
|
Once
un-locked and cleared the form could be re-edited amended and signed again.
|
|
|
|
|
|
|
|
|
11
|
Agreements
- eSigned & also
Signed by Hand – Common Misunderstandings
|
|
If
you are eSigning a Contract (or other
form) in part only then you need to be
aware the eSigned document must be
printed with eSignatures on it and then counter signed by
hand if someone is not eSigning.
|
|
A
Contract eSigned by one party (or less
than all) cannot be held separately and then “combined” with a separate
Contract that is signed by hand in biro that does not contain the eSignatures.
|
|
The
eSigned Contract and the counter signed
Contract (by hand) must be the one document and treated no
differently than a Contract signed by hand by all parties.
|
|
If
a Contract (or indeed any other form) is in part eSigned,
then print the eSigned Contract and get
that printed eSigned Contract
countersigned by hand.
|
|
A
Contract document must contain all the signatures.
|
|
No
witnessing provisions are in eSigned
documents or the signing areas. No witness signature is required for a
Contract at law.
|
|
If
users print a Contract for normal signing and it is hand signed by one
party first then the eSigning
option cannot be used.
|
|
|
|
|
|
|
|
|
12
|
Using
Templates
|
|
Templates
are created through the Settings dropdown in the top left
corner of the screen, follow My Templates. This will show a
list of your forms that you can create a template for.
|
|
See
also My Templates
|
|
Creating
a Template is a Master document, which for example may contain your
standard terms for your company.
|
|
Once
your Template has been created then next time you create a + New form
from the form list, if there is a Template associated to that document,
then a pop-up window will ask if you want to use a Template.
|
|
Select
from the dropdown menu to choose your Template to base your new form on.
|
|
|
All
templates will be available for use when creating a new form
|
|
|
Give
your form a Reference name and then all your preset terms are all in place.
|
|
|
|
|
|
|
|
|